Amini Cocoa Contamination Challenge


🍫 Introduction to Our YOLO WAY
When it comes to cocoa farming, pests and diseases don’t play fair. But neither do we — especially when we’re armed with YOLOv11, custom datasets, and a passion for clever model engineering. Here's how we built a double-barrel YOLOv11 detection pipeline, fine-tuned our image sizes like a DJ with dials, and crushed the competition in the Amini Cocoa Detection Challenge.
🍃 The Challenge
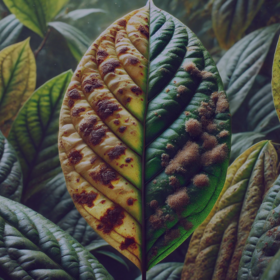
Amini tasked us with identifying plant health issues from cocoa field images — think of it as plant doctoring with machine vision. No geospatial data, no fancy satellite feeds — just raw images straight from the field, full of cocoa leaves, branches, and… trouble.
Our goal? Use object detection to identify symptoms in these images as accurately and efficiently as possible.
🔍 The Strategy: Two YOLOv11L Are Better Than One
We took a page out of the “ensemble everything” playbook — but with a twist.
1️⃣ Model One: YOLOv11 on the Raw Dataset
We started simple: train YOLOv11 on the original dataset as-is. This gave us a strong baseline and helped identify what the model learns naturally from real-world data.
🛠️ Key Tweaks:
- Standard YOLOv11 configuration
- No additional weighting or rebalancing
- Clean image augmentations and careful preprocessing
- learning_rate = 3e-4, weight_decay = 1e-2, momentum = 0.9, epochs=100 — hyperparameters we borrowed from previous competition-winning solutions ✋😮🤚
2️⃣ Model Two: YOLOv11 on the YOLOWeightedDataset
Then came the Weighted Dataset — a curated version that emphasized critical samples, likely those with rare pests or better annotations. This helped the model focus where it matters.
🎯 This strategy gave YOLOv11 an edge, especially on edge cases and underrepresented classes.
Big shoutout to @kiminya for their game-changing solution in the Ghanaian crop detection competition. We took inspiration from that, especially in handling the weighted dataset and inference process.
⏳ But Wait… 100 Epochs?
Yes, we trained both models for 100 epochs, and I know what you're thinking —
“Didn’t you exceed the time limit?”You’re not wrong. But there was a way out: patience.
Thanks to smart hyperparameters, our best checkpoints for both models landed around epochs 40–50. So, we introduced an early stopping patience of 10, which shortened total training time to under 9 hours.
📐 The Secret Sauce: Multi-Size Inference
After training, it was time to go big on inference — but not too big.
Noticed something strange? 👉 The 1024 image size didn’t perform as well as 640. Surprising, right?
Turns out, most of the dataset’s images were around 576 px. Scaling them up too much distorted key features — not what you want for object detection. So we stuck with smaller, practical image sizes.
🔁 We looped over multiple input sizes — like 576, 640, and 868 — and combined predictions smartly.
This strategy:
- Increased robustness across image contexts
- Caught small objects (at high res) and large ones (at low res)
- Acted like a pseudo-ensemble without retraining
It’s like seeing the forest and the trees, all at once.
🧪 Experimentation: Clean Pipelines, Clear Wins
Everything ran through clean, structured ETL notebooks:
- Model Dev 1: Raw dataset → YOLOv11 training → evaluation
- Model Dev 2: Weighted dataset → YOLOv11 v2 → performance comparison
- Inference Notebook: Batch predictions across multiple image sizes, with logging, performance tracking, and smart result merging
📊 We ran clean experiments, documented everything well, and iterated fast — key to staying ahead.
🧠 Lessons Learned
Here’s what worked for us:
- Two models > one — especially when trained on different dataset distributions
- Image size matters — varying resolutions during inference boosted detection accuracy
- Simple > Complex — YOLOv11 offered the perfect balance of performance and speed
🏁 Final Thoughts
What started as a humble image classification challenge turned into a full-blown YOLO-powered odyssey. By thinking creatively about dataset structure and treating inference as a first-class citizen, we built a lean, mean, cocoa-detecting machine.
To our fellow AI warriors: keep experimenting, ensemble wisely, and never underestimate the power of a good image size sweep.
These are the notebooks in case you want to go through:
📎 Resources & Links
- First Model Development: Kaggle Notebook
- Second Model Development: Kaggle Notebook
- Inference Pipeline: Kaggle Notebook
- GitHub Repo: Amini Cocoa Challenge on GitHub
If you found this useful, don’t forget to upvote 😊 Until then — Adios, and happy detecting! 👋
I like this methodology awesome congrats on achieving 5th place keep up the great work
Thanks for the kind words! 🔥
Thank you Sir
Congrats @CodeJoe @KhutsoMphelo
🔥🔥
💪🏿💪🏿💪🏿
Very nice write-up. Congrats guys!
Feeling truly honoured now😅🙇
Thank you @Stefan027
Congrats guys. That was a very smart way of thinking.
Thank you @Bone. You really did super well. I saw your boost on the board.
Thank you
Good Job !!
Thank you @KYRIEL.
That's Genius 🧠Great work 👏@CodeJoe never thought of that, my CV skills are still lacking ,thanks for the write up
Thank you @Knowledge_Seeker101 🔥🔥! I am still rusty though. Still learning.